이전에는 스프링시큐리티 기본설정으로 이용을 하였다. 그래서 기본적으로 스프링시큐리티가 제공하는 로그인 페이지를 이용하였지만 이번에는 로그인페이지를 직접 작성해서 해보자. 부트스트랩의 로그인 페이지 샘플을 가지고 구현을 해보겠다.
여기서는 기본 프로젝트 셋팅은 끝났다고 가정하고 시작하기로 한다.
build.gradle 설정
프로젝트 생성후 라이브러리 설정은 다음과 같다.
plugins {
    id 'org.springframework.boot' version '2.4.4'
    id 'io.spring.dependency-management' version '1.0.11.RELEASE'
    id 'java'
}

group = 'com.samlasoft'
version = '0.0.1-SNAPSHOT'
sourceCompatibility = '11'

configurations {
    compileOnly {
        extendsFrom annotationProcessor
    }
}

repositories {
    mavenCentral()
}

dependencies {
    implementation 'org.springframework.boot:spring-boot-starter-jdbc'
    implementation 'org.springframework.boot:spring-boot-starter-security'
    implementation 'org.springframework.boot:spring-boot-starter-thymeleaf'
    implementation 'org.springframework.boot:spring-boot-starter-web'
    implementation 'org.thymeleaf.extras:thymeleaf-extras-springsecurity5'
    compileOnly 'org.projectlombok:lombok'
    runtimeOnly 'com.h2database:h2'
    annotationProcessor 'org.projectlombok:lombok'
    testImplementation 'org.springframework.boot:spring-boot-starter-test'
    testImplementation 'org.springframework.security:spring-security-test'
}

test {
    useJUnitPlatform()
}
index.html 작성
resource/templates/폴더에 index.html을 작성한다.
<!DOCTYPE html>
<html lang="en">
<head>
    <meta charset="UTF-8">
    <title>스프링 시큐리티 데모</title>
</head>
<body>
<h1>스프링 시큐리티 데모</h1>
</body>
</html>
localhost:8080 접속
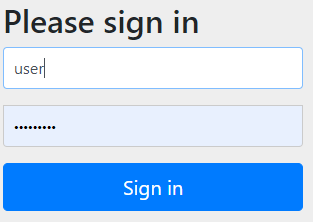
서버를 시작하고 localhost:8080에 접속한다. 스프링시큐리티 설정을 아무것도 하지 않았기에 자동설정이 되어 모든 url에 접속시 인증이 되어 있어야 되기 때문에 로그인 페이지가 나온다. 아이디에는 'user' 비밀번호는 log에 표시된 password를 입력하고 로그인을 하면 index페이지가 보여진다.

로그인 페이지작업
이제 커스텀 로그인 페이지 작업을 해보자 부트스트랩을 이용해서 로그인 페이지를 작성한다.
로그인페이지 만들기
부트스트랩 로그인 예제 페이지를 작성해보자. 예제는 다음 url을 참조하자.
getbootstrap.com/docs/4.6/examples/sign-in/
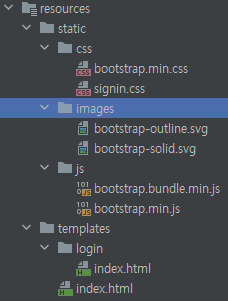
login/index.html 작성
<!doctype html>
<html lang="en">
<head>
<meta charset="utf-8">
<meta name="viewport" content="width=device-width, initial-scale=1, shrink-to-fit=no">
<meta name="description" content="">
<meta name="author" content="Mark Otto, Jacob Thornton, and Bootstrap contributors">
<meta name="generator" content="Jekyll v4.1.1">
<title>Signin Template · Bootstrap</title>
<link rel="canonical" href="https://getbootstrap.com/docs/4.5/examples/sign-in/">
<!-- Bootstrap core CSS -->
<link href="/css/bootstrap.min.css" rel="stylesheet">
<style>
.bd-placeholder-img {
font-size: 1.125rem;
text-anchor: middle;
-webkit-user-select: none;
-moz-user-select: none;
-ms-user-select: none;
user-select: none;
}
@media (min-width: 768px) {
.bd-placeholder-img-lg {
font-size: 3.5rem;
}
}
</style>
<!-- Custom styles for this template -->
<link href="/css/signin.css" rel="stylesheet">
</head>
<body class="text-center">
<form action="/login" class="form-signin" method="post">
<img class="mb-4" src="/images/bootstrap-solid.svg" alt="" width="72" height="72">
<h1 class="h3 mb-3 font-weight-normal">Please sign in</h1>
<label for="username" class="sr-only">User name</label>
<input type="text" name="username" id="username" class="form-control" placeholder="User name" required autofocus>
<label for="inputPassword" class="sr-only">Password</label>
<input type="password" name="password" id="inputPassword" class="form-control" placeholder="Password" required>
<div class="checkbox mb-3">
<label>
<input type="checkbox" value="remember-me"> Remember me
</label>
</div>
<button class="btn btn-lg btn-primary btn-block" type="submit">Sign in</button>
<p class="mt-5 mb-3 text-muted">© 2017-2020</p>
</form>
</body>
</html>
기존파일에서 form 태그에 action과 method를 추가하고 email 입력폼을 input으로 수정하고 이름을 username으로 변경한다.
index.html 수정
인덱스 파일을 로그인 전과 로그인 후를 확인할수 있게 user정보를 추가하고 logout를 버튼을 추가한다.
<!DOCTYPE html>
<html lang="en">
<head>
    <meta charset="UTF-8">
    <title>스프링 시큐리티 데모</title>
</head>
<body>
<h1>스프링 시큐리티 데모</h1>
<div th:fragment="logout" class="logout" sec:authorize="isAuthenticated()">
    Logged in user: <span sec:authentication="name"></span> | Roles: <span sec:authentication="principal.authorities"></span>
    <div>
        <form action="#" th:action="@{/logout}" method="post">
            <input type="submit" value="Logout"/>
        </form>
    </div>
    <li><a href="/user">User</a></li>
</div>
<div sec:authorize="!isAuthenticated()">
    <li><a href="/login">로그인</a></li>
</div>
</body>
</html>
/user/index.html 추가
로그인 유저만 접속할수 있는 페이지를 추가한다.
<!DOCTYPE html>
<html xmlns="http://www.w3.org/1999/xhtml" xmlns:th="https://www.thymeleaf.org">
<head>
    <title>Hello Spring Security</title>
    <meta charset="utf-8" />
</head>
<body>
<div th:replace="index::logout"></div>
<h1>This is a secured page!</h1>
<p><a href="/" th:href="@{/}">Back to home page</a></p>
</body>
</html>
로그인 컨트롤러 작성
MainController
@Controller
public class MainController {

    @RequestMapping("/login")
    public String login(){
        return "login/index";
    }

    @RequestMapping("/user")
    public String user(){
        return "user/index";
    }

}
SecurityConfig 작성
csrf는 비활성화하고 /css, /index는 접속허용, /user/** url은 USER 권한만 가능으로 설정을 구성한다. 그리고 user를 생성해주고, password encoder를 bean으로 선언해준다.
@Configuration
public class SecurityConfig extends WebSecurityConfigurerAdapter {

    @Override
    protected void configure(HttpSecurity http) throws Exception {
        http
                .csrf().disable()
                .authorizeRequests(authorize -> authorize
                        .antMatchers("/css/**","/index").permitAll()
                        .antMatchers("/user/**").hasRole("USER")
                )
                .formLogin( formLogin -> formLogin
                        .loginPage("/login")
                );
    }

    @Override
    protected void configure(AuthenticationManagerBuilder auth) throws Exception {
        auth.inMemoryAuthentication()
                .passwordEncoder(passwordEncoder())
                .withUser("user")
                .password(passwordEncoder().encode("user123"))
                .roles(("USER"));
    }

    @Bean
    public PasswordEncoder passwordEncoder(){
        return new BCryptPasswordEncoder();
    }
}
로그인 페이지 확인
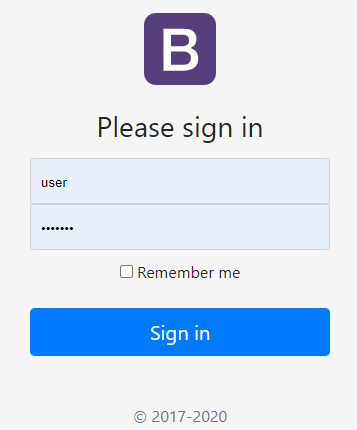
변경된 로그인 페이지
부트스트랩 로그인 페이지 적용
로그인후 인덱스페이지
로그인을 하면 유저명과 권한을 보여준다. 로그아웃 버튼도 추가 되어 있다.
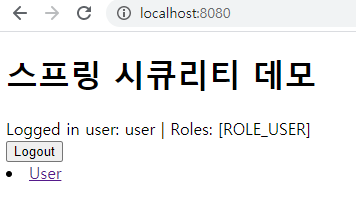
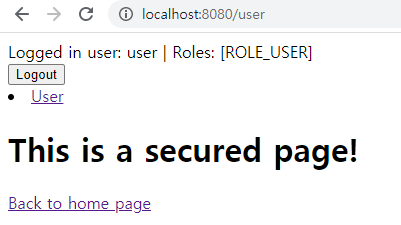
User 링크 클릭
/user 는 SecurityConfig소스의 antMatchers("/user/**").hasRole("USER") 에서 USER 권한을 가진 유저만 접근가능하다. url로 바로 접근시에는 로그인페이지로 이동한다.
마치며
이상 로그인 커스텀 페이지를 적용해보았다. WebSecurityConfigurerAdapter를 상속받은 SecurityConfig클래스를 만들고 configure 메서드에서 formLogin메서드에 로그인 url을 설정을 해주면 사용자가 직접 로그인 페이지를 만들어서 적용할수 있다.
참조: github.com/spring-projects/spring-security/tree/5.3.2.RELEASE/samples/boot/helloworld
spring-projects/spring-security
Spring Security. Contribute to spring-projects/spring-security development by creating an account on GitHub.
github.com
'웹개발 > 스프링시큐리티' 카테고리의 다른 글
| 5. 스프링 시큐리티 - Remember Me 기능 구현 (0) | 2021.04.19 |
|---|---|
| 4. 스프링 시큐리티 - 회원가입 (0) | 2021.04.19 |
| 3. 스프링 시큐리티 - h2base 적용하기 (0) | 2021.04.17 |
| 1. 스프링 시큐리티 - 기본 로그인 (1) | 2021.04.12 |
| 스프링 시큐리티에서 중요한 컴포넌트들 (0) | 2021.04.04 |


